I copied my posts from "over there" and will bring the thread from the beginning to today when I bead blasted and painted the frame.
~~~~~~~~~~~~~~~~~~~~~~~~~~~~~~~~~~~~~~~
I've been working on my '73 Kawasaki H1D 500. One problem with two strokes that have sat too long is that the crank seals dry out with can dry out and cause catastrophic failure.
I found a "donor" motor that I've been getting ready to start. I just ( today ) got a really good deal on a fresh crank for the original motor.
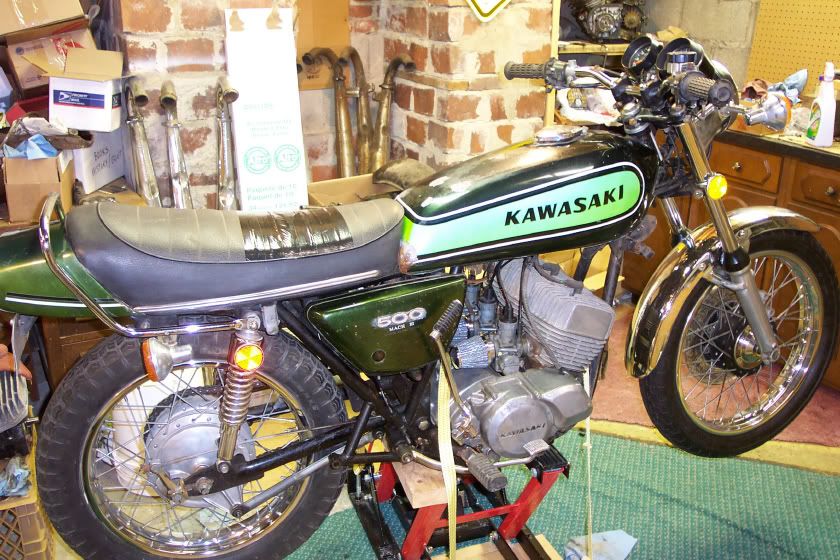
So I "buttoned" everything up to start a rebuild of the original motor. You can see the original motor sitting next to the back tire. Here's what it looks like so far ( with "survivor" tank/paint/tail )
After this motor is done, I'll start on my '74 H1 500

:seeya: Jeff
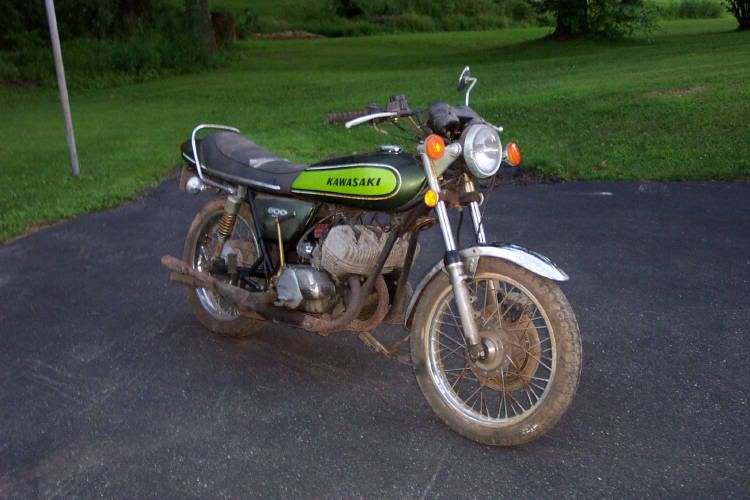
Here's what it looked like after 20 years of storage. I had it in a friend's barn for a while. I traded a couple weekends of roof repair for dry storage. He moved my bikes to a leaky section of the barn. All three triples had rear drums corroded fast. :cursin:
~~~~~~~~~~~~~~
Here's what I did yesterday.
I'm pulling apart the original engine to check out the trans, clutch and to drop in another crank with fresh seals.
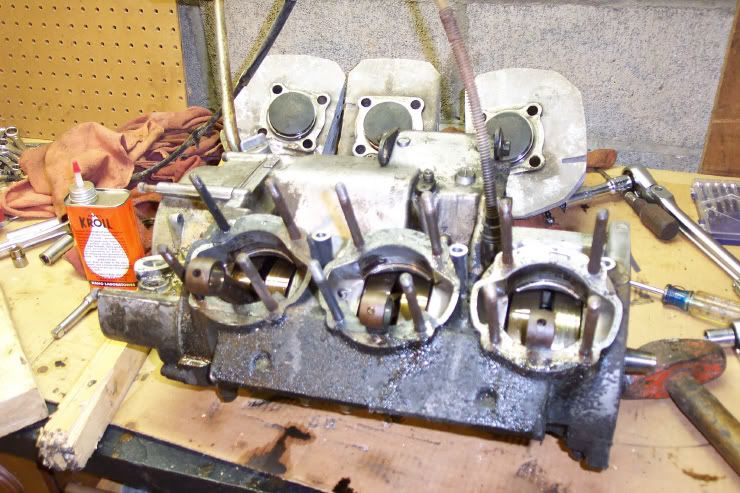
Started with popping off the heads and pulling the cylinders.
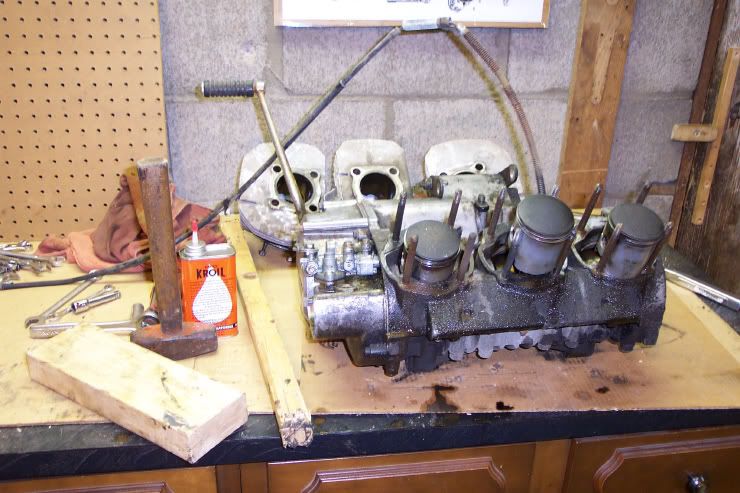
You can see the 1.5 sq piece of wood for the in the exhaust port and the 2 lb hand sledge to "help". I also used KROIL to help break things free. The left and center cylinders ( as on the bike )broke free with a couple easy taps. The right cylinder was a little stuck towards the front of the engine. Tapping with the long wood and prying with the 2x4 in the intake manifold broke it free after about 10-15 minutes. I would get it up and smack it back down with the 2x4 on the top of the cylinder. Then back to the long board.
Pistons and the bores look pretty good.
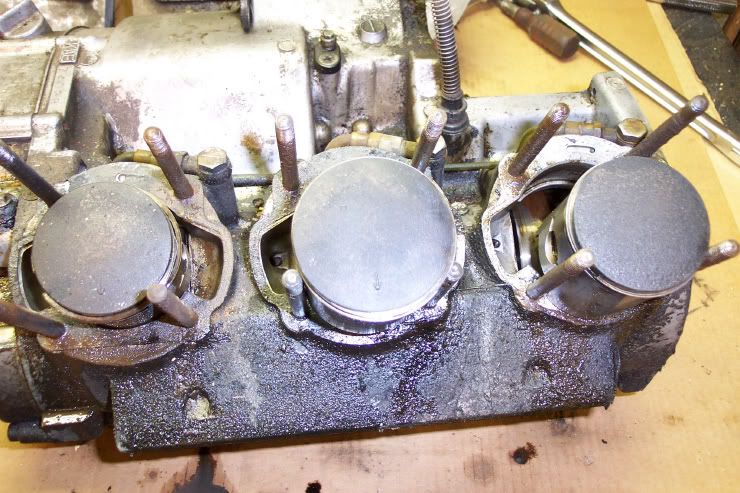
I removed the spring clips and was able to lightly tap out the wrist pins while supporting the piston in my hand.
:seeya: Jeff
~~~~~~~~~~~~~~~~
Pulled the clutch cover off and removed the clutch basket. Clutch looked really good. I think the previous owner replaced it as the gasket looked really good ( came off intact and very easy ).
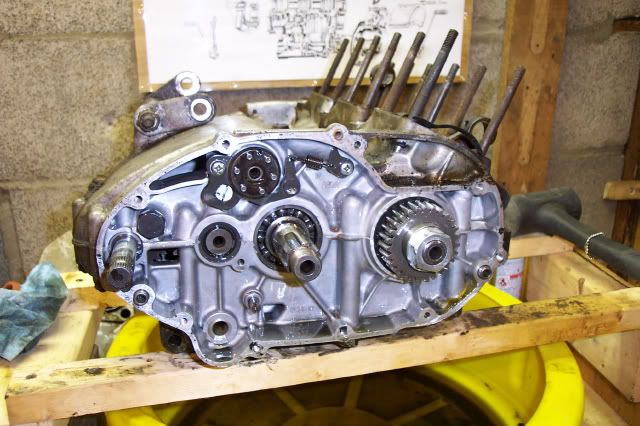
On the
"replace" list is the output shaft for the sprocket. It's hard to tell in the picture, but there is only about a turn and a half of threads left on the outside. Good thing I have extra parts.
Tomorrow night I'll slip the clutch basket back on to remove the gear off the crankshaft. Then I can split the cases.
My wife went to bed early and I was smart enough to realize she wouldn't like to hear my compressor or air tools. :chair:
:seeya: Jeff
~~~~~~~~~~~~
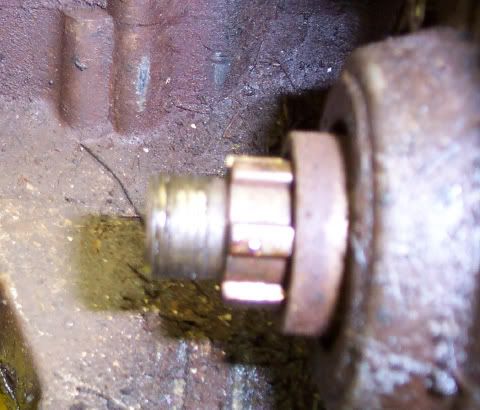
Got my cases split tonight after using the air gun to zip off the crank nut. My wife thanked me for waiting until tonight to do it

The "good"
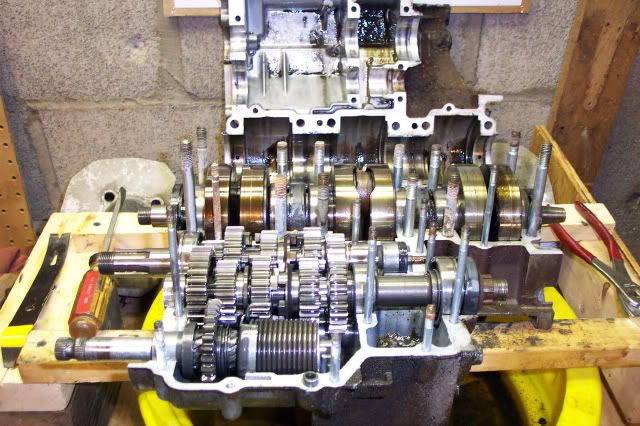
The "bad" was one of the crank bearings is just a little loose. It's a good thing I didn't run it more or it could have come apart.
Here's the ugly.
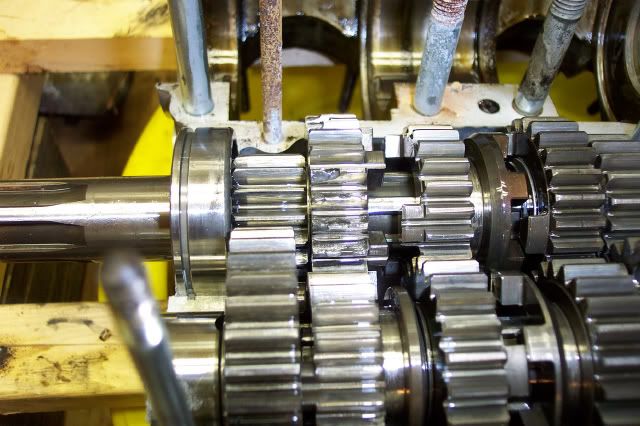
Seems one of the gears had something run thru at one time or another. :yikes:
I have an extra complete trans that I will be putting in.
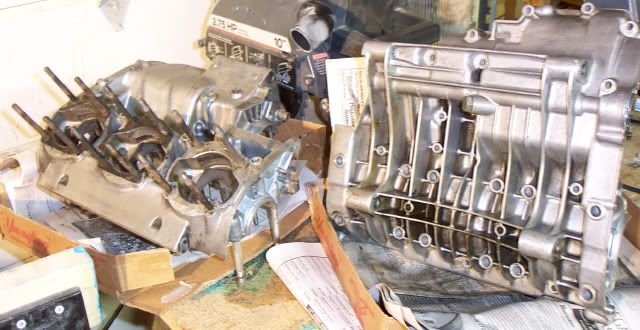
Now comes the labor intensive case prep to make it "pretty"
Cases will be cleaned and brought to uniform finish. The cylinders and heads will be glass beaded and spray painted silver.
:seeya: Jeff
~~~~~~~~~~~~~~~~~
The pictures are both for your viewing pleasure and so I can put it back together again :slol: If you ever take
anything in bags or boxes to be put back together, it costs a lot EXTRA :cursin:
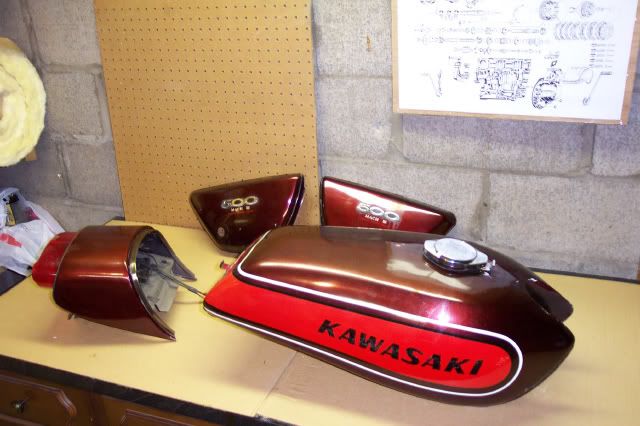
Here's a picture of the body work I picked up for my '74 H1 and on the wall you can see an exploded view poster of the Kawasaki triple engine. It's actually a H2 750 , about 99% of it is identical to a H1 500.
I'll get some pics of the cleaned cases ( just power washed and parts cleaner ) up later.
:seeya: Jeff
~~~~~~~~~~~~~~~
I took my cases into work on friday and used our parts washer to get most of the grime off. Then I power washed them.
They turned out OK but were still kind of cruddy. I stopped over at my friend's garage and used his parts washer. Much,much better
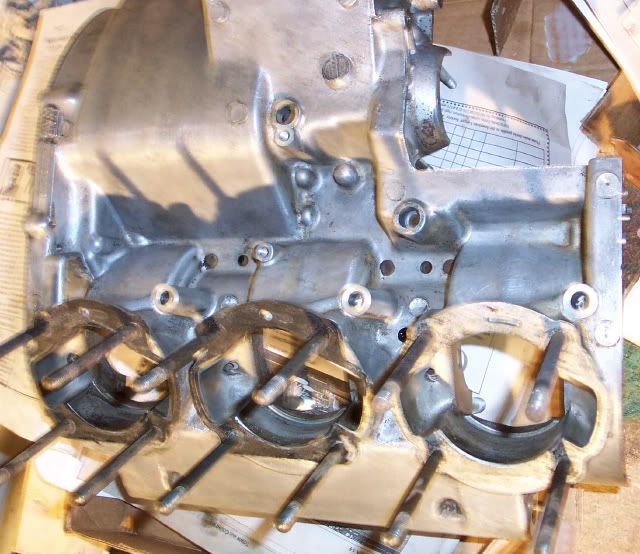
They still need to get bead blasted with plastic beads.
Just for reference, here's what they looked like before I started.
I had previously used Fantastic and 4X steel wool to clean the area under the carbs.
:seeya: Jeff