
|
 |
 |
 |
 |
 |
 |
 |
 |
 06-23-2008, 12:54 PM
|
#1 | |||
|
Hold mah beer!
Join Date: Feb 2008
Location: 80 Miles South of Moto Heaven
Moto: 08 R1200GS
Posts: 23,268
|
Here is a quick write up for those interested.
If you don't feel like fabricating your own brackets or shaving the integrator yourself, please contact Tripage of http://www.tripageled.com you can purchase everything you need from him to do this conversion including a license plate bracket for relocating the license plate as seen on mine. I used lite'n bolts as my license plate light, but Tripage can actually install some LEDs into your rear tire hugger to work as your license plate light as well. Wiring is the only pics I do not have, you are on your own for wiring this up. It's mostly plug and play, but you do have to splice turn signals and license plate lights into your wiring. Here is tripages prices: Quote:
 Now comes the hard part, it's best to do this mod at the same time you put a new exhaust on because you pretty much have to remove your exhaust or battery try to remove this part. If you look at your tail their is a huge ugly heat shield to prevent your butt from burning from the extremely hot stock pipe. You can see what it looks like in this pic if you don't remove or shave it, it's hideous. I heard of people removing it completely with a new exhaust, but I chose to shave mine to where you can't see it at all to still provide some protection from heat. It's your choice to what you want to do with it, but it's the hardest part of this job. 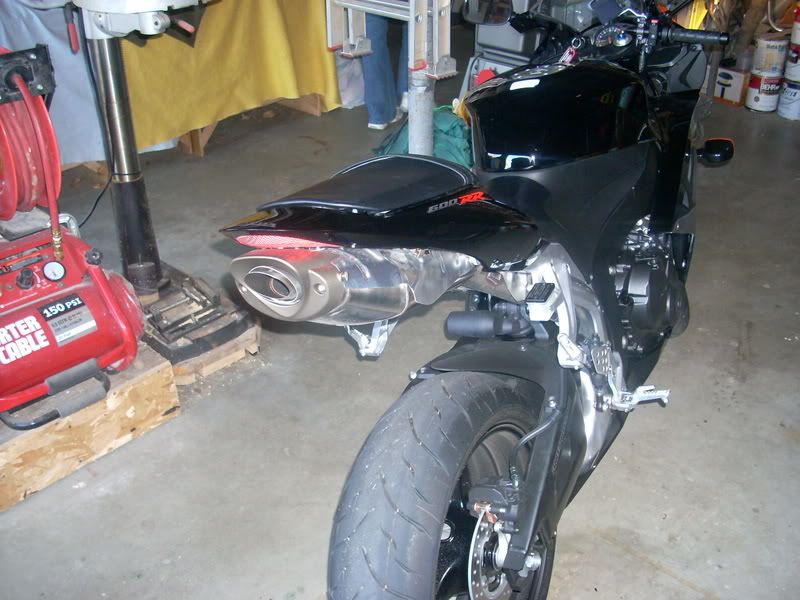 Next you need to cut your battery tray so your light will fit. I am going to assume you are using a tripage setup because that's what I got pics for. If you want to do it another way, the distance for shaving the battery tray and creating a good seal underneath the tail is on your own head. Here is the pic of how far you should cut with the tripage setup.  Next you want to put in the foam provided by Tripage at the very end of the tail so you can rest your taillight on the foam creating a good seal. Here is a pic of the inside of the tail show how the foam seals the tail between the light and the battery tray.  Now before you close everything up, you need to splice in all your wiring and connect all connections. Once you have done that, test to make sure that the taillight works for running light, braking, and turn signals; also if you installed a license plate light make sure it is connected and working at this point as well. You may need to run a lot of wire to connect it to the inside of your tail through the front battery compartment and between the fairing battery tray to the license plate bracket/rear tire hugger. Now that you know the electrical works, you want to close everything up. Start by shoving the taillight into the fairing as far as you can. Assuming you already shaved it. You need to shave off the brackets on it and around some of it. It's a lot easier to just get Tripage to do this for you by buying your taillight through him. Have your brackets already installed when you shove the taillight in, brackets from tripage look like this:  Reattach tail with taillight in it to bike and tighten down bolts, you have to be strong with it to get this damn thing to fit properly. It aggravating trying to keep all the wiring on the battery tray and fit this thing, while keeping the taillight in place without it popping out. Once you do it a couple times it's a little easier, but still a pain in the ass. Now, put your seats back on it should be finished and look like this:  If you have a seat cowl, flip it over and put some washers/nuts on the two rear screws that hold the painted cowl and the underneath black piece together. The washers/nuts will have to go between these two pieces and into those two dimples made in the black piece to raise the painted part up away from the black piece to make it fit better on the tail now that you raised it up considerably with the taillight mod. You still have to pry the damn thing on though. Here is a pic of a non tripage setup, however, I don't know how well it works or if there is any problems because it is a lot closer to the pipe and could brown easier.  GOOD LUCK WITH YOUR MOD! :dthumb
__________________
Quote:
Quote:
|
|||

|

|
|
06-23-2008, 03:19 PM
|
#2 |
|
Kneedragger
Join Date: Mar 2008
Location: Stoneham MA
Moto: 2006 CBR1000RR
Posts: 192
|
nice write up, thats the only thing i hate about our bikes...the undertail exhaust makes it hard to work on
__________________
2006 CBR1000RR - 154 RWHP Full Akra TI Evo / Hex Canister, PC-III custom map, BMC Race filters, Woodcraft Rearsets, Pazzo Levers, OEM Cowl Seat, Flapper Mod, Sporttech windscreen Pirelli DCIII's 190/55, Flushmounts, Jardine Fender Eliminator, EBC brake pads 1995 XR250R- Dirt Toy Delta CO 181 Infantry |
|
|
|
 |
| Bookmarks |
|
|


 Linear Mode

