
|
 |
 |
 |
 |
 |
 |
 |
 |
 03-09-2008, 08:42 PM
|
#1 |
|
restorer of the original
Join Date: Mar 2008
Location: Zionsville,PA
Moto: '93 ZR1100 &'73 Kawasaki H1 500
Posts: 1,331
|
I copied my posts from "over there" and will bring the thread from the beginning to today when I bead blasted and painted the frame.
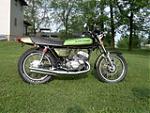
~~~~~~~~~~~~~~~~~~~~~~~~~~~~~~~~~~~~~~~ I've been working on my '73 Kawasaki H1D 500. One problem with two strokes that have sat too long is that the crank seals dry out with can dry out and cause catastrophic failure. I found a "donor" motor that I've been getting ready to start. I just ( today ) got a really good deal on a fresh crank for the original motor. So I "buttoned" everything up to start a rebuild of the original motor. You can see the original motor sitting next to the back tire. Here's what it looks like so far ( with "survivor" tank/paint/tail ) 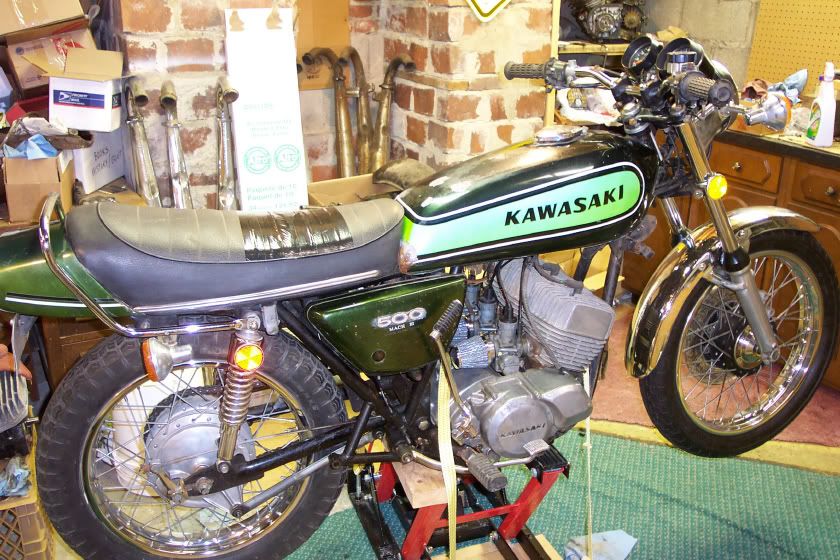 After this motor is done, I'll start on my '74 H1 500  :seeya: Jeff Here's what it looked like after 20 years of storage. I had it in a friend's barn for a while. I traded a couple weekends of roof repair for dry storage. He moved my bikes to a leaky section of the barn. All three triples had rear drums corroded fast. :cursin: 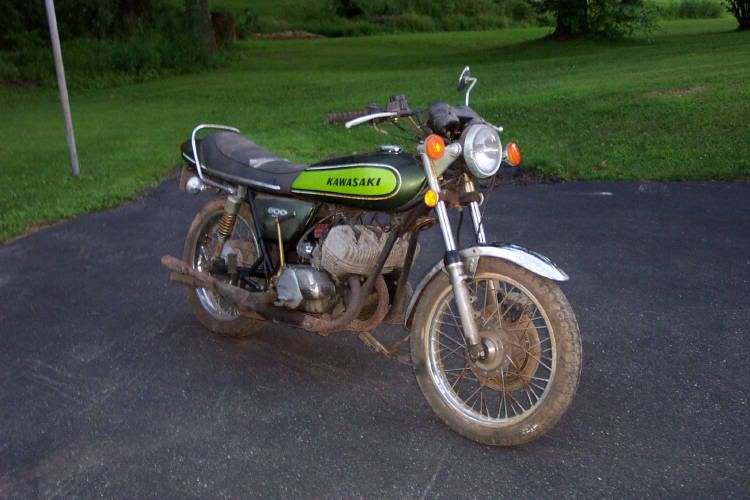 ~~~~~~~~~~~~~~ Here's what I did yesterday. I'm pulling apart the original engine to check out the trans, clutch and to drop in another crank with fresh seals. Started with popping off the heads and pulling the cylinders. 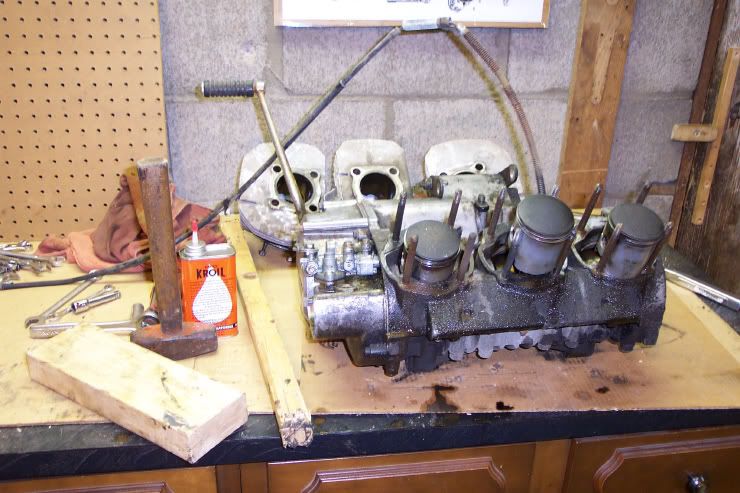 You can see the 1.5 sq piece of wood for the in the exhaust port and the 2 lb hand sledge to "help". I also used KROIL to help break things free. The left and center cylinders ( as on the bike )broke free with a couple easy taps. The right cylinder was a little stuck towards the front of the engine. Tapping with the long wood and prying with the 2x4 in the intake manifold broke it free after about 10-15 minutes. I would get it up and smack it back down with the 2x4 on the top of the cylinder. Then back to the long board. Pistons and the bores look pretty good. 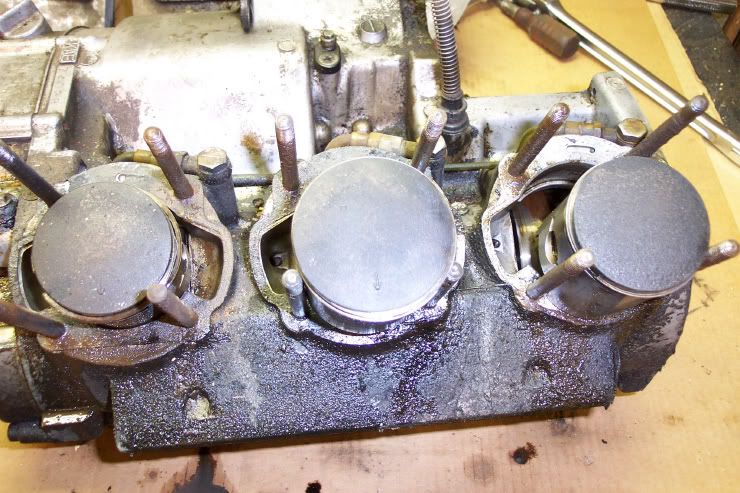 I removed the spring clips and was able to lightly tap out the wrist pins while supporting the piston in my hand. 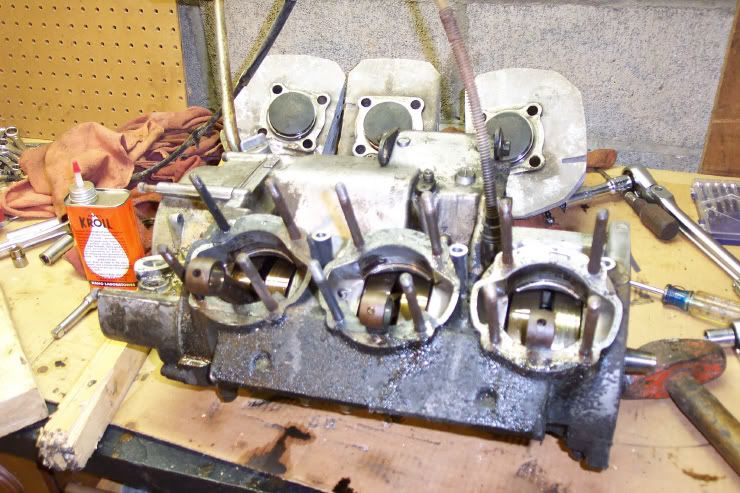 :seeya: Jeff ~~~~~~~~~~~~~~~~ Pulled the clutch cover off and removed the clutch basket. Clutch looked really good. I think the previous owner replaced it as the gasket looked really good ( came off intact and very easy ). 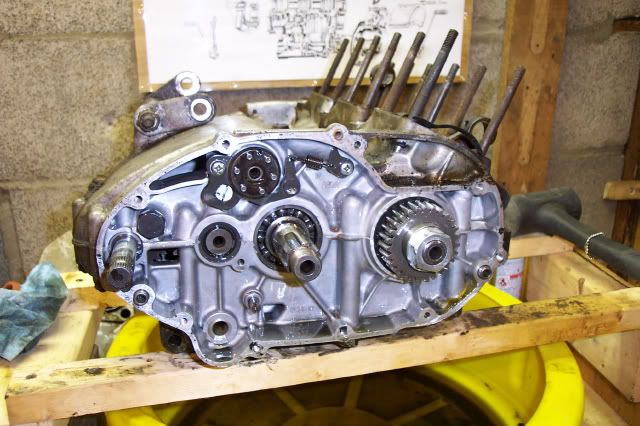 On the "replace" list is the output shaft for the sprocket. It's hard to tell in the picture, but there is only about a turn and a half of threads left on the outside. Good thing I have extra parts. 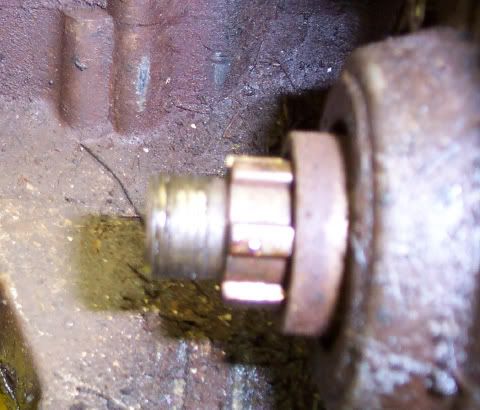 Tomorrow night I'll slip the clutch basket back on to remove the gear off the crankshaft. Then I can split the cases. My wife went to bed early and I was smart enough to realize she wouldn't like to hear my compressor or air tools. :chair: :seeya: Jeff ~~~~~~~~~~~~ Got my cases split tonight after using the air gun to zip off the crank nut. My wife thanked me for waiting until tonight to do it  The "good" 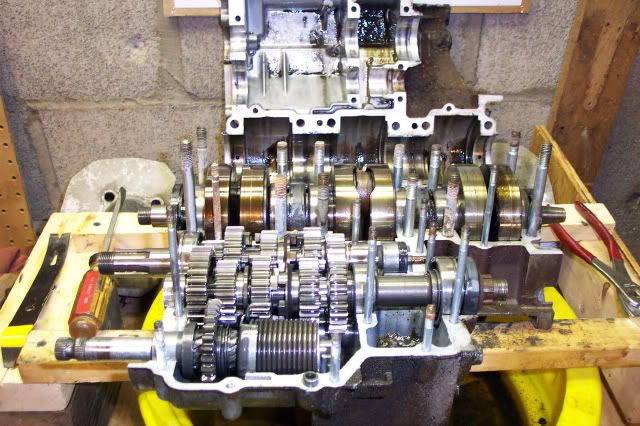 The "bad" was one of the crank bearings is just a little loose. It's a good thing I didn't run it more or it could have come apart. Here's the ugly. 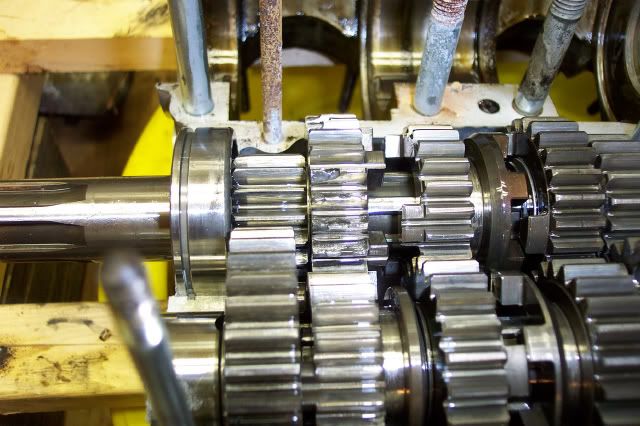 Seems one of the gears had something run thru at one time or another. :yikes: I have an extra complete trans that I will be putting in. Now comes the labor intensive case prep to make it "pretty" Cases will be cleaned and brought to uniform finish. The cylinders and heads will be glass beaded and spray painted silver.:seeya: Jeff ~~~~~~~~~~~~~~~~~ The pictures are both for your viewing pleasure and so I can put it back together again :slol: If you ever take anything in bags or boxes to be put back together, it costs a lot EXTRA :cursin: Here's a picture of the body work I picked up for my '74 H1 and on the wall you can see an exploded view poster of the Kawasaki triple engine. It's actually a H2 750 , about 99% of it is identical to a H1 500. 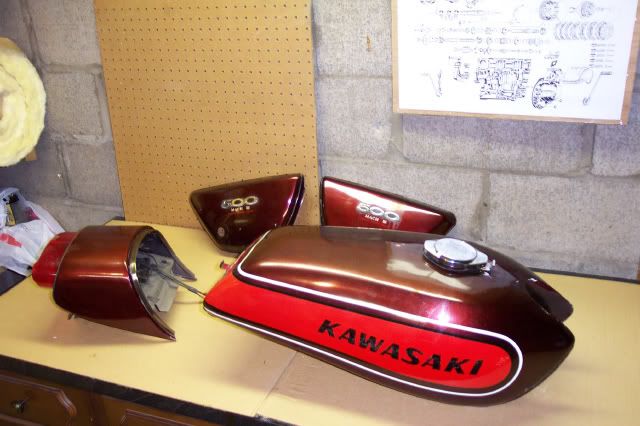 I'll get some pics of the cleaned cases ( just power washed and parts cleaner ) up later. :seeya: Jeff ~~~~~~~~~~~~~~~ I took my cases into work on friday and used our parts washer to get most of the grime off. Then I power washed them. They turned out OK but were still kind of cruddy. I stopped over at my friend's garage and used his parts washer. Much,much better 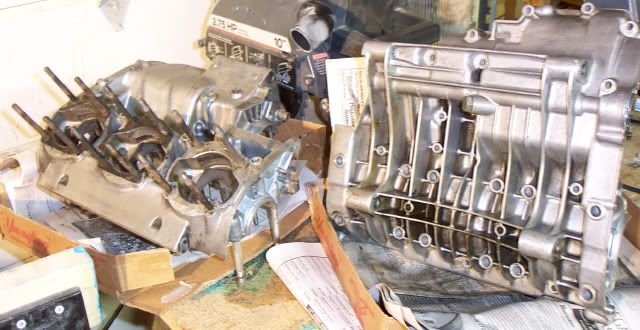 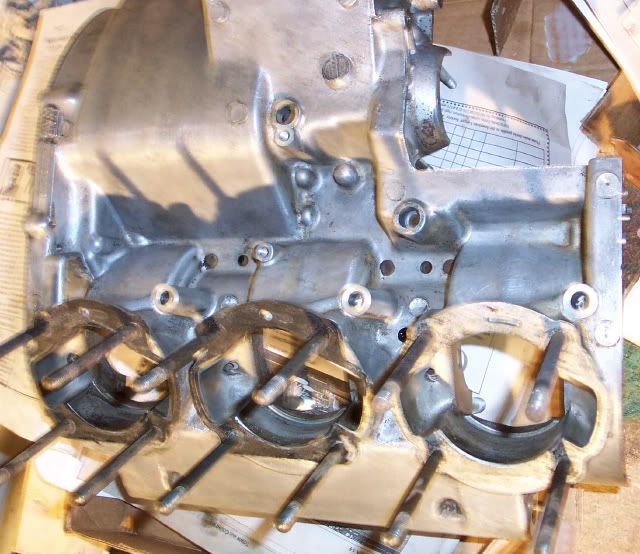 They still need to get bead blasted with plastic beads. Just for reference, here's what they looked like before I started. I had previously used Fantastic and 4X steel wool to clean the area under the carbs. :seeya: Jeff |

|

|
|
03-09-2008, 08:51 PM
|
#2 |
|
restorer of the original
Join Date: Mar 2008
Location: Zionsville,PA
Moto: '93 ZR1100 &'73 Kawasaki H1 500
Posts: 1,331
|
I spent 2-1/2 hours today after work at the glass beading cabinet. Amazing how much those little glass beads can do to improve the surface.
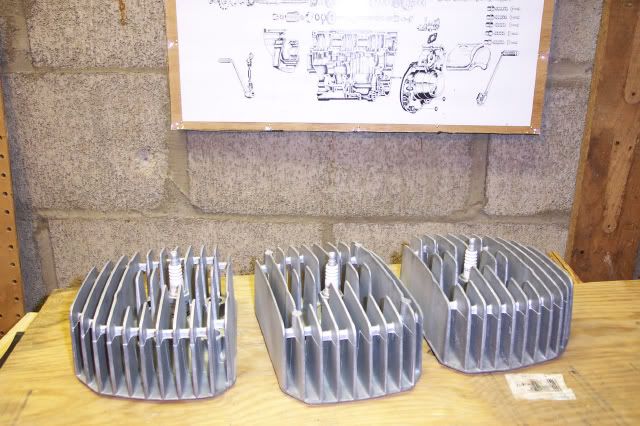 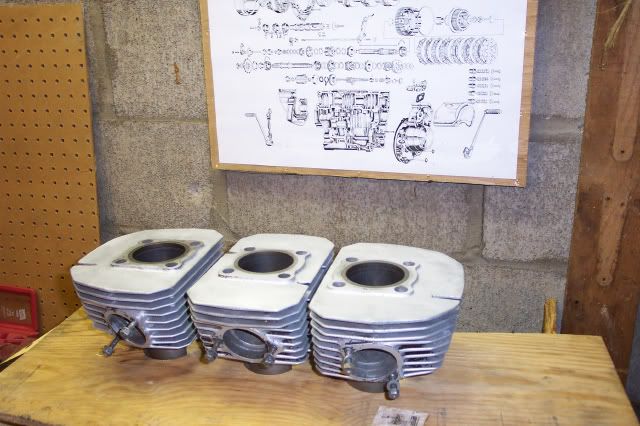 Here's a pic to show what the cylinders/heads looked like before. I also have replaced the headlight ears, headlight bucket, master cylinder, front caliper, handlebars, front rim & tire, rear rim & tire, rear shocks, gas tank ,side covers & put in a NOS wiring harness ( so far ) 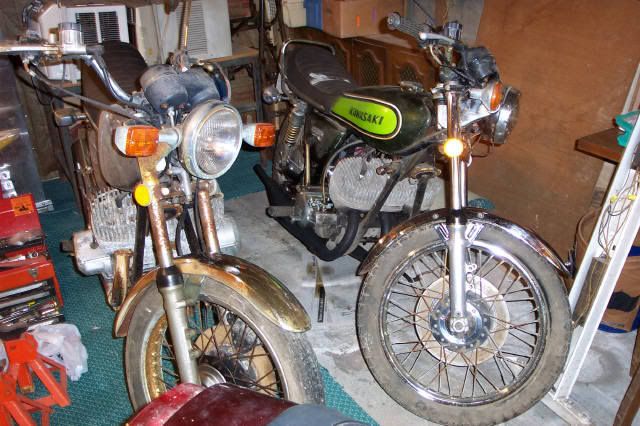 :seeya: Jeff ~~~~~~~~~~~~~ That seems to give a finish close to the original. That's what was recomended by the guys on the triple forum. I used extra fine glass beads. Takes forever but you end up with a nice finish. I use the extra fine black beauty for sand blasting the frame. Removes the paint without excessive pitting. ~~~~~~~~~~~~~~~~~~~~ I just quite a few hours with scotch brite pads on my cases. Turned out pretty well. I slid the cylinders and heads on so it "looked pretty"  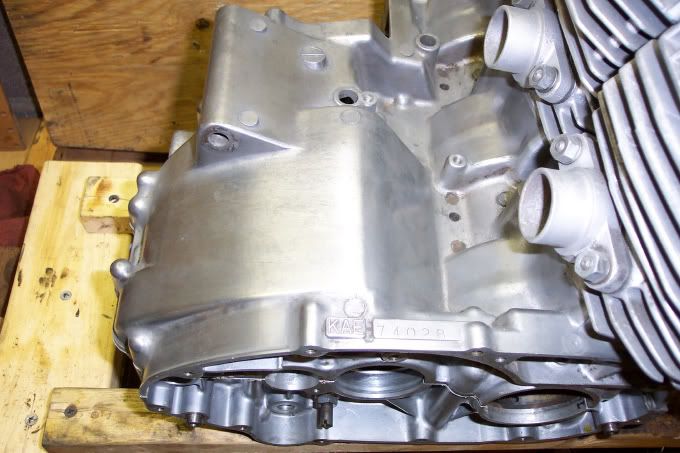 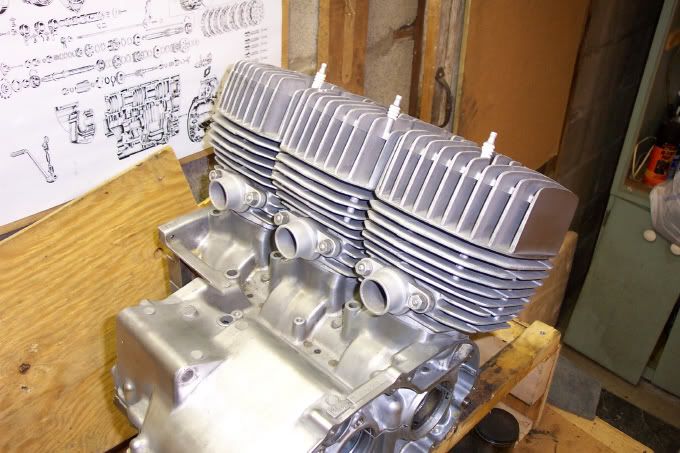 Got a decent shine on the outside fin on the head ( did the outside fin on each of the outer heads) 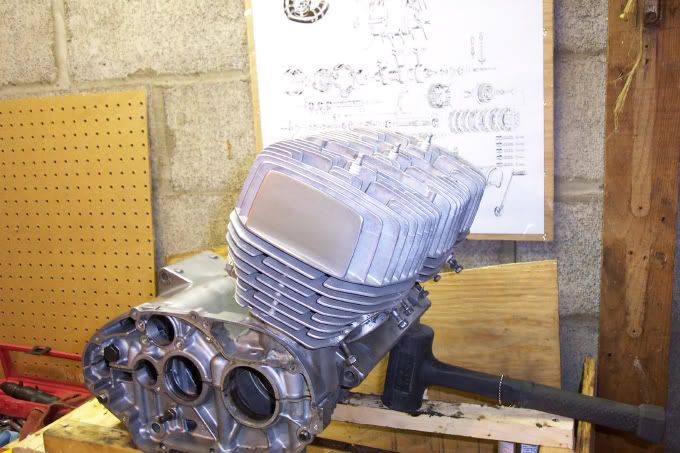 Doesn't look too bad considering it looked like the '74 H1E motor on the shelf when I started. 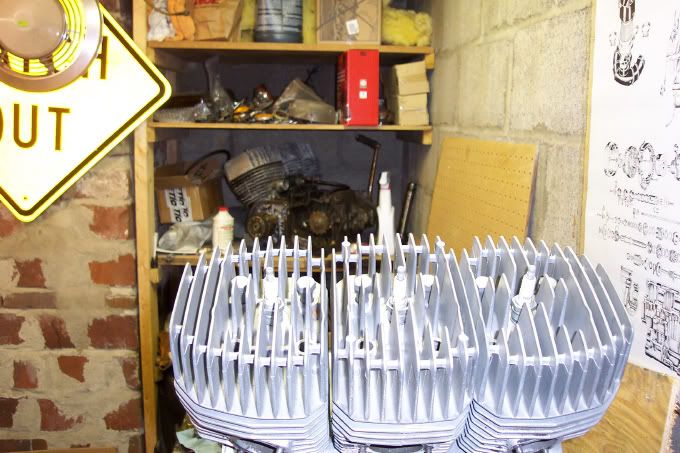 :seeya: Jeff ~~~~~~~~~~~~~~~~~~~~~ Yup, does feel good looking at what you've done As far as Pebble Beach, my work isn't nearly good enough ( and my pockets aren't that deep ) Now the work/restorations done by Brian H. is truly breath taking. Here's a pair of '72 H2's he did.  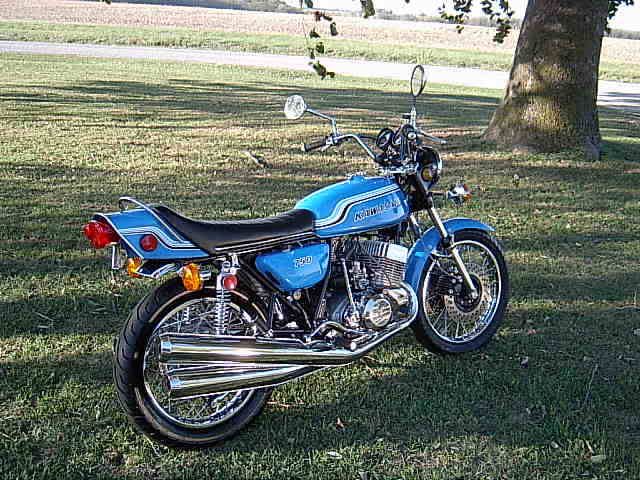  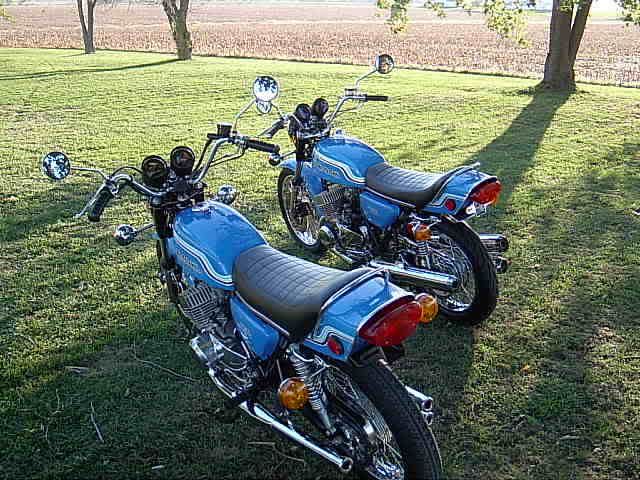 :seeya: Jeff |
|
|
|
|
03-09-2008, 08:53 PM
|
#3 |
|
restorer of the original
Join Date: Mar 2008
Location: Zionsville,PA
Moto: '93 ZR1100 &'73 Kawasaki H1 500
Posts: 1,331
|
Finally got over to NJ to my friend's place to plastic bead blast the cases. Nice uniform finish now.
I also had to order a seal set. Thought I had a set but didn't  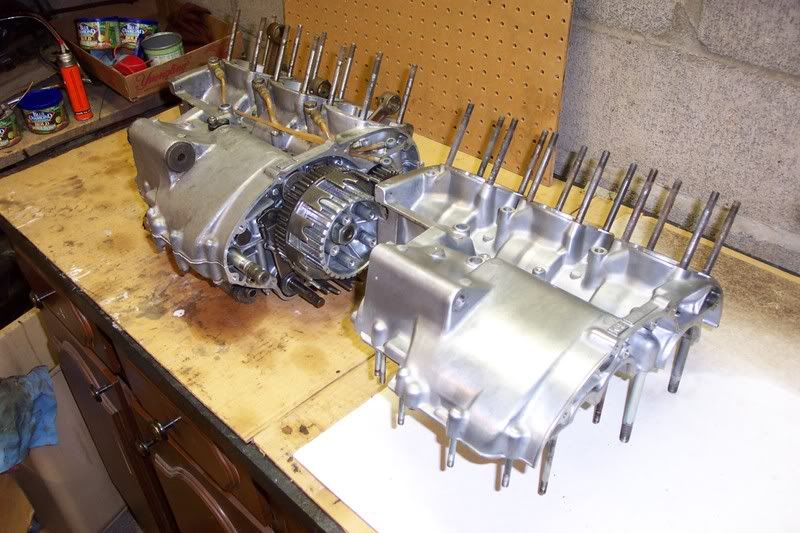 I had purchased a complete bottom end from another triple enthusiast to transplant into my bike. I transfered the crank and the gear set into my original cases for my '73 H1. 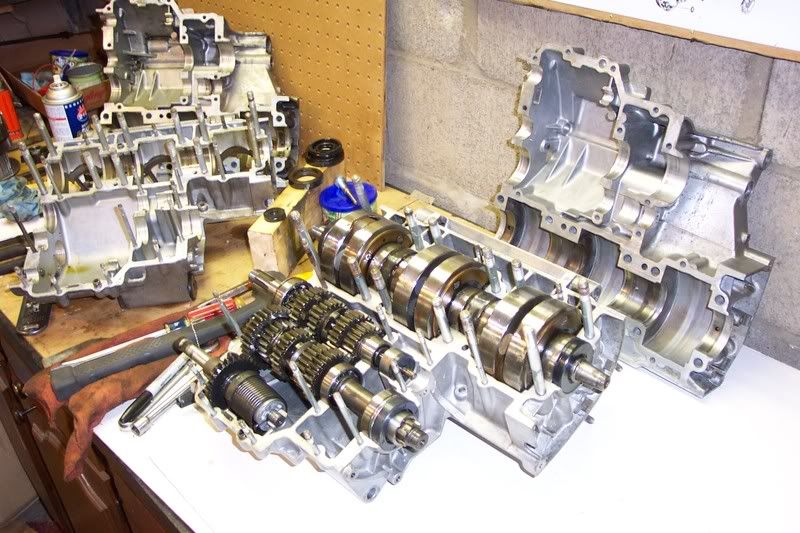 I had put the cases together last night but the gears weren't shifting.  After checking on the triple forum, I found out I didn't "over oil" the shift drum. It "probably" would have been OK, but I didn't want to take a chance. Better to spend an extra hour or two now than have to remove and strip down a complete motor. :cursin: After checking on the triple forum, I found out I didn't "over oil" the shift drum. It "probably" would have been OK, but I didn't want to take a chance. Better to spend an extra hour or two now than have to remove and strip down a complete motor. :cursin:I pulled it apart last night and reassembled it again tonight. Plenty of oil was poured onto the shift drum. I made sure all the gears shifted correctly while sitting in the top case ( it gets assemebled into the top half) and checked it again after torquing the cases. :seeya: Jeff ~~~~~~~~~~~~~~~~~~~~~~~~ Got some more work done on the triple engine today. Installed the crank gear and the clutch basket. Torqued them to 85 ft lb and also found out that mechanix gloves would be a great investment. I took a some chunks out of my thumb and forefinger :cursin: Found out "new skin" burns when you put it on too :yikes: Got the clutch installed and the sidecover. I purchased new stainless steel allen bolts for the engine too. 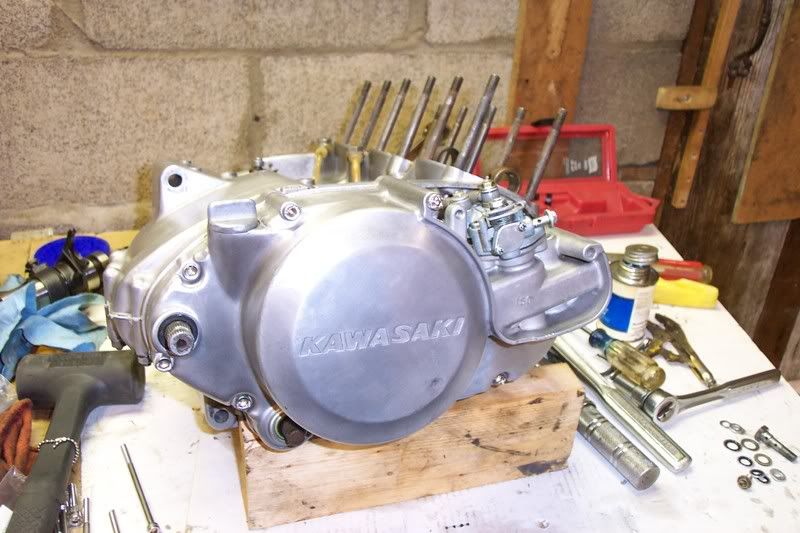 I put "anti-seize" on the engine side of the gasket so if I have to remove the clutch cover later, the gasket won't tear. Also installed the oil lines and the oil injection pump. 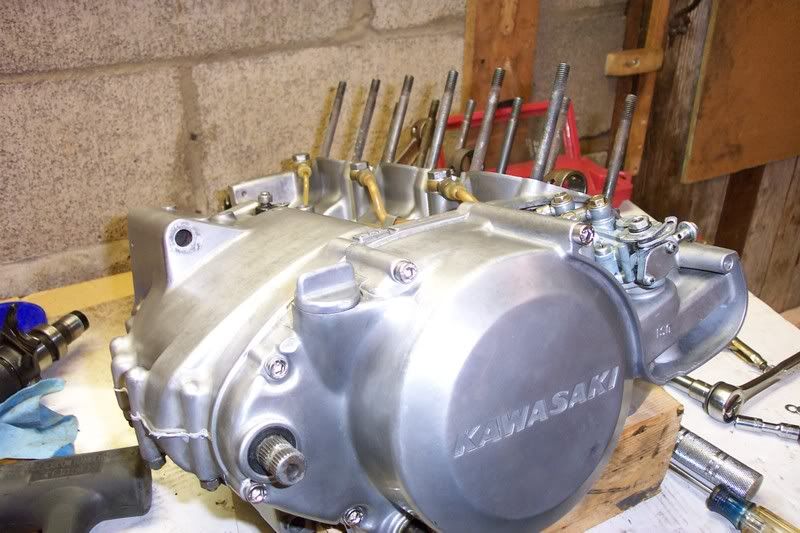 Instead of the aluminum crush washers for the banjo bolts, I purchased "Stat-O-Seals" to use instead. They're an aluminum outer washer with a rubber o ring on the inside. They seal much better.  I put the needle bearings in the rods and installed the pistons. Still need to put in the circlips and rings before I put the cylinders on. (pic was before I put them on)  :seeya: Jeff ~~~~~~~~~~~~~~~~~~~~ Got a little more done tonight. Here was my first purchase this afternoon before grabbing a wrench. Took a week for my gouges to heal. 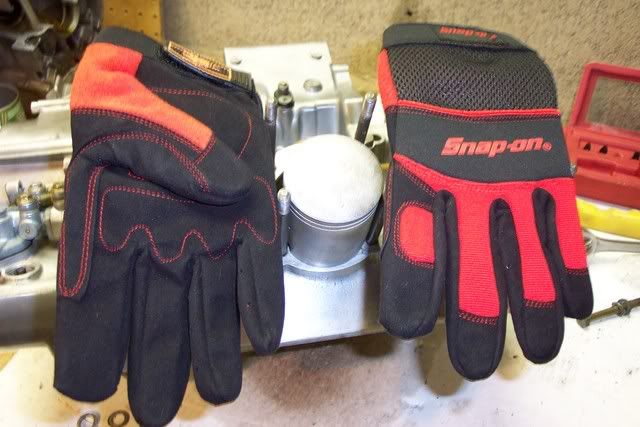 I got the last pair of XL at my local ACE hardware for $18.  I put in the circlips in the pistons. I stuffed clean rags in the openings so nothing would fall into the cases. I did NOT want to pull the cases apart again. 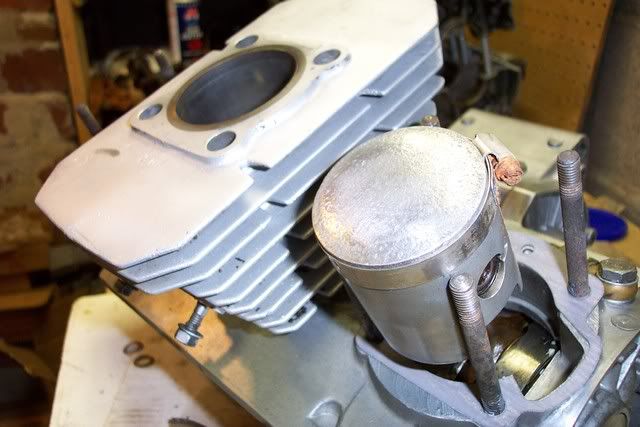 How's that for a "high tech" piston ring compresser I found a perfect sized hose clamp off an old air cleaner.Since this is a two stroke with an oil injection pump, I want to prime the oil pump and fill the lines. So I got some 3/8 NPT ( national pipe taper ) half fittings that were the same thickness as the heads.  I put them on the studs and torqued them down to 16 ft lbs. 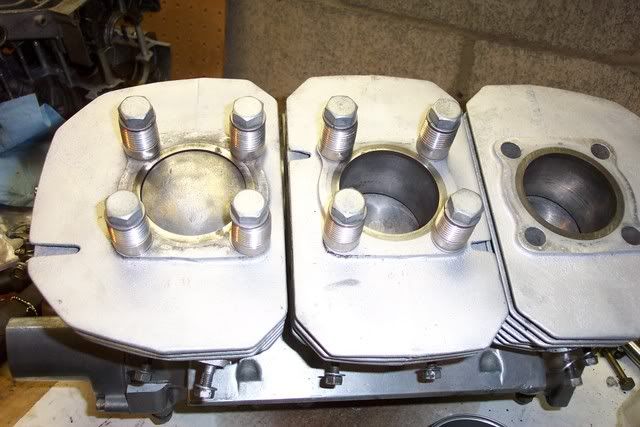 Tomorrow I"ll rig up an oil tank and make it so I can spin the engine with a big 1/2" drill I borrowed from work :seeya: Jeff |
|
|
|
|
03-09-2008, 08:55 PM
|
#4 |
|
restorer of the original
Join Date: Mar 2008
Location: Zionsville,PA
Moto: '93 ZR1100 &'73 Kawasaki H1 500
Posts: 1,331
|
I primed the oil pump today. I borrowed a drill motor from work to run the crank CCW.
I did not have the stator on, so I cleaned the threads with a tap ( M8-1.25 on my H1) and used a bolt with a full size jam nut against the crank. I used a 1/4" drive 6 point socket on the bolt head with an extension held in the chuck of the large 1/2" drill motor. The other way to do this would be with a socket head cap screw ( with a jam nut ) using a cut off allen wrench in the drill motor. 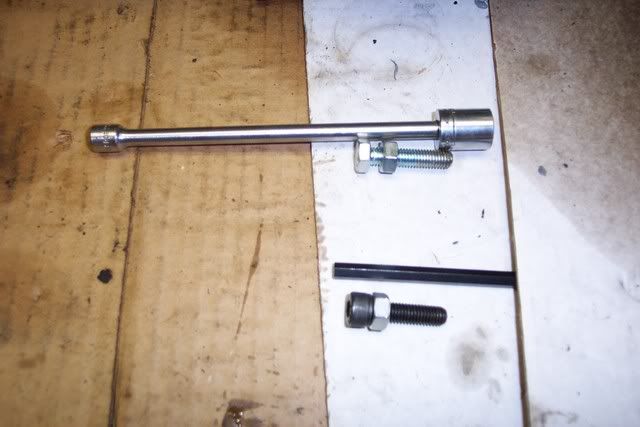 Here's everything ready to go. "Hey!! Where'd you get the oil tank?"  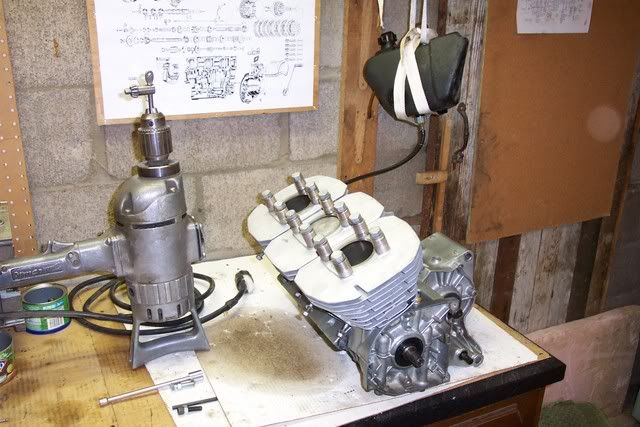 Works for me 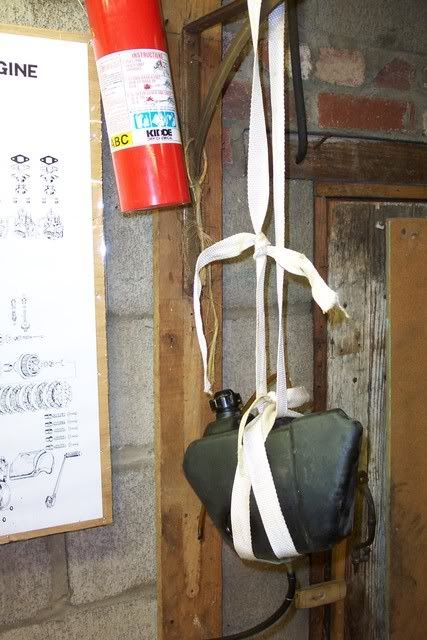 Make sure the oil pump is held at maximum flow. 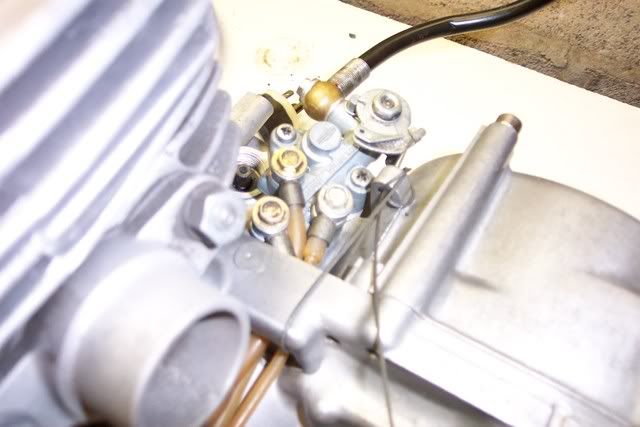 The 1/4" extension fit in the end of the drill motor chuck. 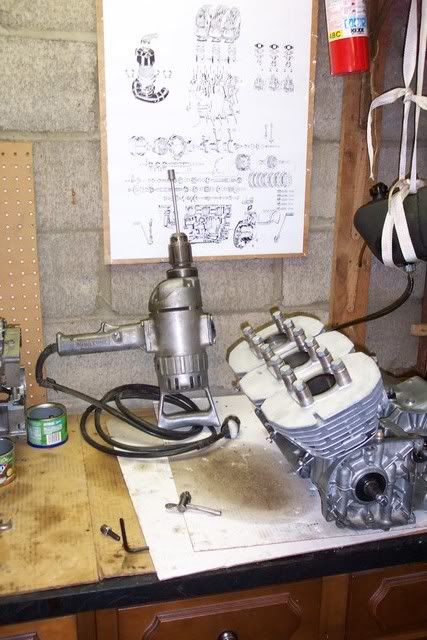 The drill motor was rated at 650 rpm. I hooked up a tach and sure enough, that's how fast I was turning the crank. 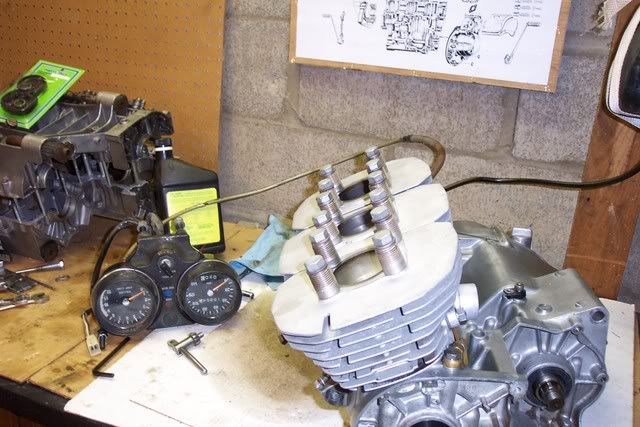 Here's another picture of me running the drill motor with one hand while taking a picture. It went really easy. 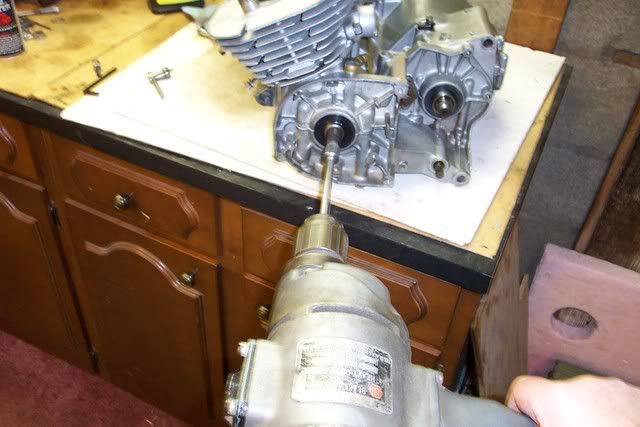 Lines are primed and the cylinders got oil on them ( I did have injector oil on them before I started). Later I take off the half couplers and put on the heads with new copper gaskets. :seeya: Jeff ~~~~~~~~~~~~~~~~~~~ I took off the spacers and installed the heads with brand new copper gaskets. Torqued the heads down to 16 ft lbs.  Now it's time to take everything off the frame to sandblast and paint it. :seeya: Jeff Sears was running a special on this 154 pc set, down from $150 to $100. English & metric in 1/4", 3/8" & 1/2" sockets ( deep 6 point, and 6 & 12 point ) plus wrenches.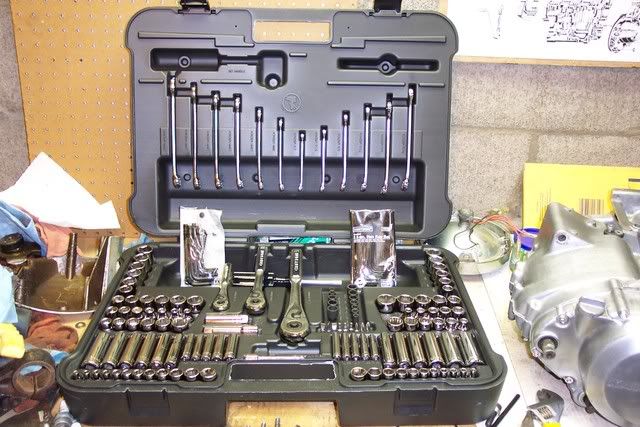 Here's what I started with..... and got it to this point before dinner. 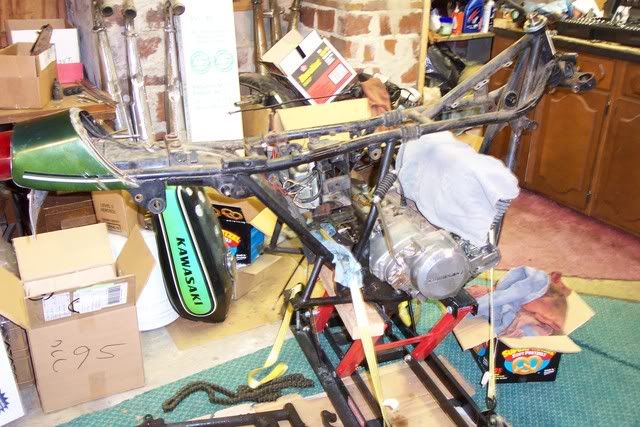 Off to pull the motor and the final few parts :seeya: :seeya: Jeff ~~~~~~~~~~~~~~~~~ More progress this week. The frame is stripped down and will be sandblasted next weekend. 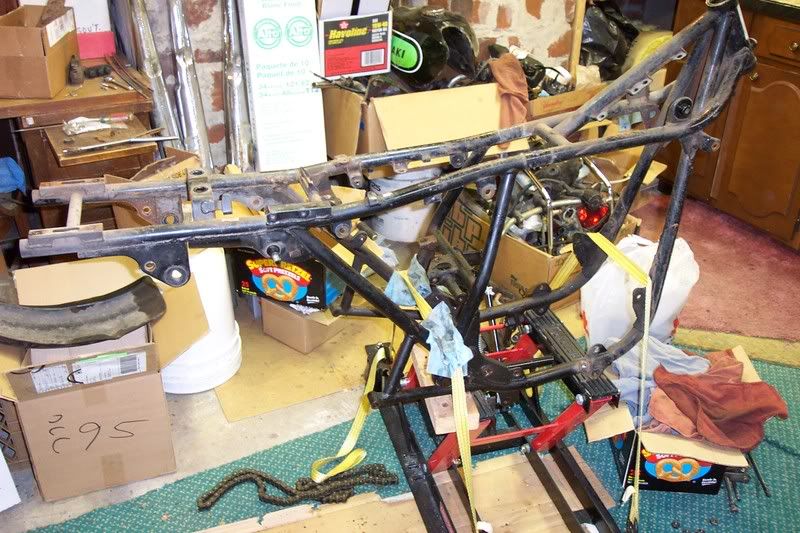 I glassbeaded and painted the battery box, oil tank mount, rectifier mounting plate, headlight bucket and the upper triple tree. Everything turned out well except the headlight bucket. A fly landed and got stuck in the paint ( right on an area you see :bas: ) 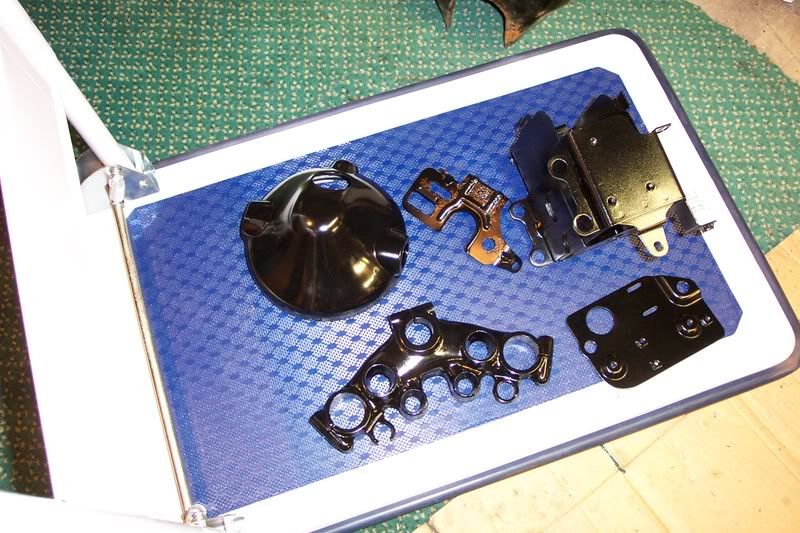 I stopped over at my friend's Kurt garage and used his parts washer to clean up some parts. 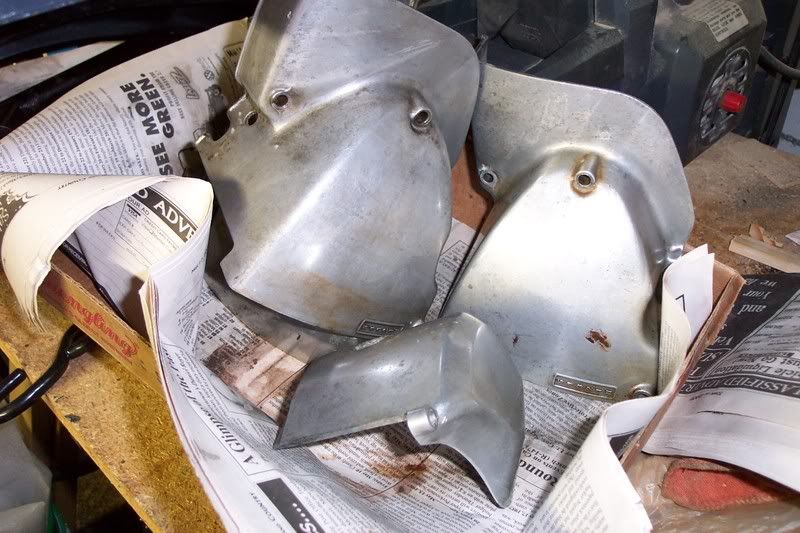 The inspection sticker on the inner fender was current in 1976   :seeya: Jeff |
|
|
|
|
03-09-2008, 08:58 PM
|
#5 |
|
restorer of the original
Join Date: Mar 2008
Location: Zionsville,PA
Moto: '93 ZR1100 &'73 Kawasaki H1 500
Posts: 1,331
|
This post has the correct date
 The weather finally cooperated enough that I could bead blast the frame and swing arm. I used extra fine "Black Beauty" as the blast media. I did the bead blasting at my friend Dave's. ( thanks Dave  ) )I took the frame into work immediately following the bead blasting and painted it with Rustoeum Appliance Epoxy in gloss black. ( It has two coats of paint on it. The light area is from the camera flash) 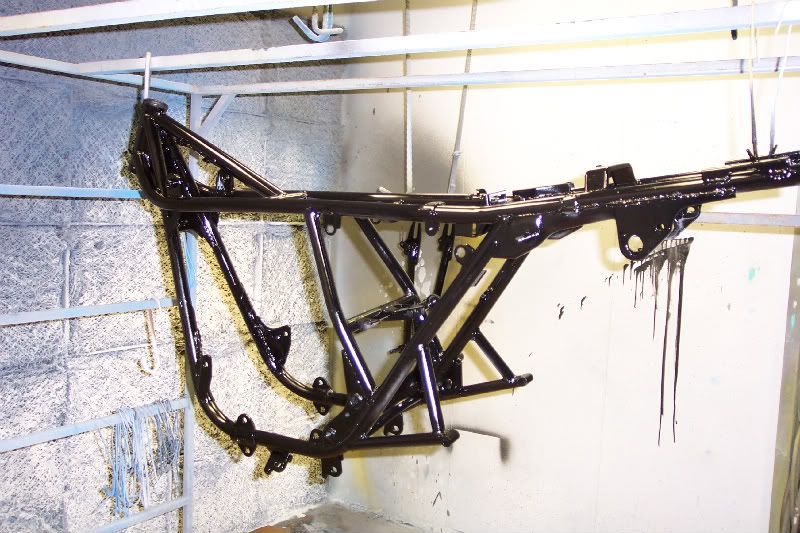 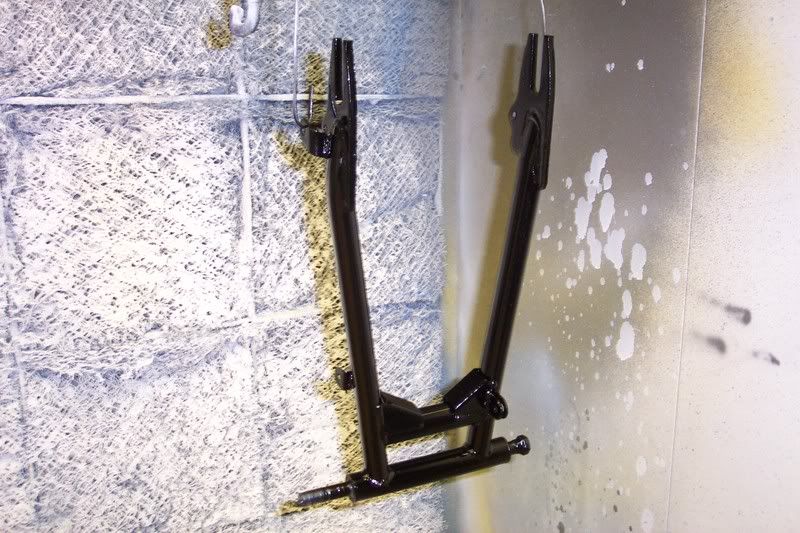 Now I can finally start putting it back together  :seeya: Jeff |
|
|
|
|
03-09-2008, 09:04 PM
|
#6 |
|
Ride Like an Asshole

Join Date: Feb 2008
Moto: nothing...
Posts: 11,254
|
Why not powdercoat the frame? I figure that would hold up better, right?
|
|
|
|
|
03-09-2008, 09:24 PM
|
#7 | |
|
restorer of the original
Join Date: Mar 2008
Location: Zionsville,PA
Moto: '93 ZR1100 &'73 Kawasaki H1 500
Posts: 1,331
|
Quote:
|
|
|
|
|
|
03-10-2008, 02:05 PM
|
#8 |
|
Trip's Assistant
Join Date: Feb 2008
Location: Imported from Detroit
Moto: 2009 HD Street Classic
Posts: 12,149
|
Do Work Son!
|
|
|
|
|
03-11-2008, 01:27 AM
|
#9 |
|
Pompous Prick
Join Date: Mar 2008
Location: MA
Moto: 06 R6 (race), 04 CRF Tard (race)
Posts: 3,040
|
Jeff,
I always liked this thread. I'm really glad you brought it over. Keep up the good work, man!
__________________
LRRS/CCS #123 Boston Moto Dunlop Woodcraft 35 Motorsports Sidi Pit Bull K&N Filters |
|
|
|
|
03-11-2008, 01:43 AM
|
#10 |
|
moderator chick
  
Join Date: Feb 2008
Location: Hill Country TX
Moto: Pasta Rockets
Posts: 8,917
|
Wow, what awesome work! LOVE the detail in the pictures.
__________________
We have enough youth. How about a fountain of "smart"? Come Play at the Track!! http://www.elitetrackdays.com |
|
|
|
 |
| Bookmarks |
|
|


 Linear Mode

